Sunday, April 29, 2007

AA 1 week 7


This weeks exercise deals with recording of the voice. The photo, right, is a reconstruction of the position of the microphone in all of the recorded examples below. The vocalist was also position facing the buffer in the dead room.[1]

Sample 1
MICROPHONE: Nuemann U-87
PATTERN: Cardioid [2]

Whisper U-87

Sample 2
MICROPHONE: Nuemann U-87
PATTERN: Cardioid [2]

Talking U-87

Sample 3
MICROPHONE: Nuemann U-87
PATTERN: Cardioid [2]

Yelling U-87

Sample 4
MICROPHONE: Shure Beta 58
PATTERN: Cardioid [2]

Yelling 58

Sample 5
MICROPHONE: Shure Beta 58
PATTERN: Cardioid [2]

Screaming 58


Comments

In sample 1 the problem of sss did come to light. Tristan, who supplied the vocals stated that he did have a bit of a lisp and I found that this was enhanced during the recording, (this is one aspect of vocal recording that I will continue to work on. Sample 2 there really wasn't any problems. In samples 3 and 4 I found that the beta 58 was, at least in my opinion, easier to work with. It seemed to give the vocals a more dynamic feel compared to the U-87. There was also a dramatic difference between sample 3 and 4 with regards to the gain level on the Avalon. In sample 3 using the U-87 the gain was on 30 whilst in sample 4, using the beta 58 the gain had to be boosted to 50. The last example, sample 5 was in part recorded to indulge Tristan's feeling that he had more to give vocal wise. We did a level check at which point I had the gain adjusted so as not to peak. Straight after the level was right Tristan once again screamed into the microphone with the result being that he must have increased his volume slightly as there was one peak in the recording. Due to this on the next take I left a little extra head room to allow for this in case it re-occurred. All the samples were recorded using ProTools HD[3], and used the compressor through the Audio suite.[1]

Special thanks to Tristan Louth-Robins for his patience and exertion in supplying the vocals.

[1]Fieldhouse, S. "Audio Arts Lecture week 6" at University of Adelaide , 24/04/2007

[2]http://www.emu.adelaide.edu.au/resources/guides/hardware/microphones.html

[3]Digidesign. "Pro Tools HD version 7.3.1" http://www.digidesign.com/index.cfm

Friday, April 6, 2007

Forum week 6

In this weeks forum rather than the scheduled topic, Stephen Whittingham decided to wrap up the subject of the previous two forums, (collaborations) by inviting presenters to discuss collaborations from a participants point of view as all the previous presentations were speaking of collaborations made by participants other than themselves.

After a short introduction by Mr. Whittington, Luke Harrald discussed collaborations from his POV, using a short film in which he wrote the score for as an example. He suggested that collaborations can be made not only between people, but also with computers as well as with different spaces. He didn't elaborate much on collaborating with spaces but did discuss his collaborations with computers, ie writing software, finding that it does something unexpected, and developing this unexpected outcome. He also discussed that as well as all the normal considerations, (a lot of which were discussed in previous forums) you have to be aware of commercial considerations, eg. in his score their was no money for live musicians.[1]

David Harris spoke next of a couple of collaborations with visual artist Pamela Rataj, both of which involved 'collaboration' with the space it was to be performed in. He spoke of how he drew inspiration from her art and the space. David also reflected on some of the other collaborations the were also going on in regards to the musicians and with the film maker who recorded the second project.[2]

The next presentation was by Poppi Doser and the person she collaborated with on an animation project, Betty Qian. Poppi spoke of the troubles that they had communicating due to Betty Qian not having very good English language skills (as English is her second language). Due ti this there was a lot of acting out and charades of the scenes as the two were developing the project. Despite of this Poppi Doser stated that she didn't think that this impeded or changed the way she worked on the project.[3]

Stephen Whittington had the final word on the subject and raised the notion of "Collaborating with the Dead." He started by playing part of a piece by Beethoven. He then stated that whilst this was not a collaboration in the normal sense of the word, the performance of somebodies music who was long since passed still has aspects of collaborations in regards to interpreting the piece in the sense that you are working with someone else's ideas.[4] The floor was then opened up for any questions or discussion on what was presented.


[1]Harrald, L. "Forum week 6", at University of Adelaide, 05/04/07
[2]Harris, D. "Forum week 6", at University of Adelaide, 05/04/07
[3]Doser, P. "Forum week 6", at University of Adelaide, 05/04/07
[4]Whittington, S. "Forum week 6", at University of Adelaide, 05/04/07

CC 1 week 6

Interpreting the score

On discussion with Tristan Louth-Robins, I decided to interpret the score (pictured below), as a number of different scenes with each different type of image/group being represented by whatever image or picture that it seemed to represent to me. See below picture:


Region 1.........../Reg 2/Reg 3/Reg 4/Region 6.........................

Region 7....................................../Reg 8/Region 9...........
Soundscape 3

Region 1: Ripping to shreds.
Region 2: Chimes
Region 3: Chimes rolled up
Region 4: Chimes (bot more intense)
Region 5: Ripping to shreds [Reprise] smaller=higher, different dynamics.
Region 6: One sound for all the strips, using there differences to suggest different dynamics, pitches, duration, etc.
Region 7: Smaller version of region 3
Region 8: Paper sample that I had edited previously that already had a similar diminuendo shape.

Creating the Score

The score was created using many of the techniques used in the previous soundscapes. In addition to these I also tried to use the super tool as much as possible, eg. fade ins/outs, cross fading and for time shifting. Eleven tracks plus an Auxilary track were used (the Aux track was used to bus in a delay effect)[1].

[2]


[2]

[2]

[1]Haines, C. Lecture "Creative Computing" at University of Adelaide, 05/04/07
[2]Digidesign. "Pro Tools HD version 7.3.1" http://www.digidesign.com/index.cfm

Thursday, April 5, 2007

AA 1 week 6

Sample 1

MIKE: Neumann U-87 [condenser]
PATTERN: Figure 8[1]
PROXIMITY: Aimed at 14th fret (30 cent. away.[2]

U-87 fig 8


Sample 2

MIKE: Neumann U-87[condenser]
PATTERN: Cardioid[1]
PROXIMITY: Aimed at rear lower [2]

U-87 Cardioid


Sample 3


MIKE: Neumann KM-84i[condenser]
PATTERN: Cardioid[1]
PROXIMITY: Aimed at soundhole[2]

KM-84i soundhole


Sample 4
MIKE: Neumann KM-84i[condenser]
PATTERN: Cardioid[1]
PROXIMITY: Aimed at back of hand[2]

KM-84i behind hand


Sample 5
MIKE: Rode NT4[condenser]
PATTERN: Cardioid[1]

PROXIMITY: 3-5 cm away from fret 15, aimed at bass and treble.[2]


NT4.mp3


Summary

Even though I don't think my samples were great, I think my miking technique and choice will get better with more experience. During the process of this exercise I also got the chance to work with Freddie May, who has a heap more experience than myself, just sitting there and playing while he made his mike placements etc. taught me so much. The thing that I'll take most from this session with Freddie is how at certain stages he was moving the microphone whilst wearing headphones so he could hear exactly what sound was going into the desk. One point that I forgot to actually do while recording was to activate the high pass filter. Unfortunately I was more concerned with placement an proximity that I forgot all about this feature and was trying to activate post signal being recorded instead of realising that it effects the signal before it gets to the 192. Also big thanks to Darren Slynn who patiently played guitar for all the sample recordings.

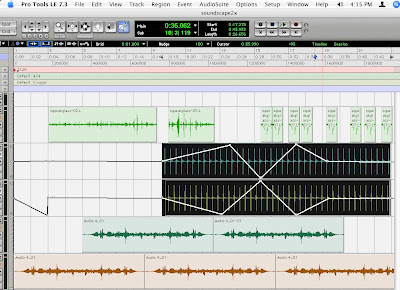
Pro Tools edit window showing one stereo track and the rest mono.[3]

[1]http://www.emu.adelaide.edu.au/resources/guides/hardware/microphones.html

[2] Fieldhouse, S. "Audio Arts Lecture week 6" at University of Adelaide 03/04/07

[3]Digidesign. "Pro Tools HD version 7.3.1" http://www.digidesign.com/index.cfm

Tuesday, April 3, 2007

Forum week 5

This weeks forum topic was "collaborations Part 2." Luke Digance was the first student to present. He discussed the collaboration between a choreographer (Cunningham) and two bands, Radiohead and Sigur-ros (not sure of this spelling). One of the interesting points made about this collaboration was the addition of chance in the performance, eg. a coin would be tossed at the beginning of the performance to determine which bands music would start the show. This collaboration was more like two separate collaborations that combined to make one product, the link being Cunningham (choreographer).[1]

Next up was Daniel Murtagh, who's presentation outlined some of the many collaborations that Mike Pattern (Faith No More) has made. Patterns collaborations range from reasonably mild musical material to some material that was pretty heavy[2]. After hearing some examples of these extremes in style and genre I was left wondering just what was Mike Pattern's real style, I wonder if he even knows?

Darren Slynn presented next. His emphasis was on the reason for the collaboration, be it ego necessity, the chance to work with a particular person, etc. He used Frank Zappa as an example of somebody who collaborates out of necessity. Zappa, while being brilliant lacked certain skills for the projects he worked on. One example of this was when he got into making his own movies, Zappa needed to collaborate with someone so that his ideas could make it to the screen[3].

The last presentation, by Alfred Essmyr, discussed collaborations between composers/artists and DJ's. He suggested this is a way for artists to get their music out there and heard by the public. In this sort of collaboration both parties he suggested benefited even though each collaborator is doing his/her own thing[4].


[1]Digance, L. "Collaborations Part 2", Forum Workshop, University of Adelaide, 29/03/07
[2]Murtagh, D."Collaborations Part 2", Forum Workshop, University of Adelaide, 29/03/07
[3]Slynn, D. "Collaborations Part 2", Forum Workshop, University of Adelaide, 29/03/07
[4]Essmyr, A. "Collaborations Part 2", Forum Workshop, University of Adelaide, 29/03/07

CC 1 week 5

This week for my soundscape I decided to make the paper representation first (picture below) and then cater the soundscape to this picture.

Soundscape2


Processes Used

Automation: select pan (line appears down centre of track/wave)- with hand tool click to create node - drag node to left and right.[1] (This was also done with volume and Master Fader.)
Time Shifting: select Time Shift tool- click and drag to required length.[1]
Audio Suite: highlight particular wave - Audio Suite menu - type of effect wanted - window appears - choose settings.[1]
Repeat: highlight wave - click on repeat - select how many times to repeat.[1]
Consolidate: highlight wave - while holding down shift click on all waves to be consolidated - click on consolidate from Edit menu.[1]
Plug in: click on plug in space - select type of plug in - make settings.

Summary

From the picture above my aim was to create a soundscape that was twisted and distorted/disorienting. In the picture below the highlighted sections (black) show two waves on two separate tracks with the pan automation showing. The tracks were identical until I used Times Shift to shorten one of the waves fractionally so as to create a sort of offset effect that would continually be changing. At certain points this created a reverb effect naturally. The bottom two tracks (below) was one sample that had been stretched and then copied a number of times to create a kind of canvas to layer the other sounds onto. I would have loved to have spent more time on this soundscape so as to tweak the samples so that when played the hairs on the back of your neck would have stood on end, but I'm not sure whether I'd ever be satisfied until the point where people on hearing this, would start shuddering and squeamish.


Screenshot Pro Tools Edit Window [2]


[1]Haines, C. Lecture "Creative Computing" at University of Adelaide, 29/03/07


[2]Digidesign. "Pro Tools HD version 7.3.1" http://www.digidesign.com/index.cfm

Sunday, April 1, 2007

AA 1 week 5

In this weeks exercise all samples are made with the microphone approx. 1 metre from the sound source and on axis. This was for my own benefit as I have not had much experience with different types of mikes and thought that this would give me the best examples of the differences between the various types.

Sample 1 & 2

Samples one and two were both recorded using a Neumann U-87 microphone. There was one sound source, (guitar) that was on axis while a second sound source was at 90 degrees (someone couting to ten). The first recording was using the omni pattern on the U-87, whilst the second used a figure eight pattern. The result was that the omni sample picked up both sources evenly, whilst in the figure 8 pattern the sound source that was at 90 degrees sounded a little diastant. The Neumann U-87 is a condenser microphone with Omni, Figure 8 and Cardioid patterns. Its range is 40-16000 Hz.[1]


Neumann U-87 omni

Neumann U-87 fig 8


[3]
[3]


Sample 3

Beta57 microphone was used. Being a dynamic microphone (ie with wire wrapped around the diaphram[2]), I found that the gain had to be boosted to record the same guitar part as in examples 1 & 2.

Shure Beta57

Sample 4

Behringer XM2000S (also dynamic) required more gain to pick up a signal. The guitar source was at the same distance as in all the samples so far. This sample seemed to sound a little warmer than the beta57.

Behringer XM2000s

Sample 5

Rode NT4, a stereo microphone with a cardioid pattern with a range of 20-20000 Hz[1]. This microphone requires a special canon lead that has a female end with holes for five pins, whilst the other end has the normal three pins except for the fact that there are two of them. This mike also needs to be recorded into a stereo track (see below red track)

Rode NT4

[1]http://www.emu.adelaide.edu.au/resources/guides/hardware/microphones.html

[2] Fieldhouse, S. "Audio Arts Lecture week 5" at University of Adelaide 23/03/07

[3] Streacher, R.In "Choosing the right microphone" at http://www.rycote.com/information/ Accessed 31/03/07